Creating and editing profiles in Dolphin {anty}
After logging into Dolphin{anty}, the first thing that appears is the "Browser Profiles" section. There are several ways to create profiles:
- Create a single profile 🌐
- Mass profile creation ⚡️ ("mass import")
- Copying a profile 📋

Create one profile 🌐
To create a profile and start using the browser:

- Click the "+" button in the top right corner.
- A profile creation window will pop up.
- The profile is ready to go — on creation it's assigned a new, unique fingerprint by default, so there's no need to generate one manually. Just enter a profile name, add a proxy and cookies if needed, then choose the profile type (FB, Google, TikTok, Crypto). This is purely for your own convenience and doesn't affect anything. If you plan to use the profile across different sites, just pick "Not specified."
- Changing the fingerprint is optional — it's already unique. But if the current values don't suit you for some reason, click "New fingerprint" and the profile will get a different one. More details about the meaning of all settings.
- After that, click "Create profile".
To start working, click the "Start" button, and the browser profile will open with the specified settings.
To close a profile, simply close the browser window that opened. Alternatively, you can click the "Stop" button in the Dolphin{Anty} app window — same result either way. 😉
Mass profile creation ⚡️

- Download the template via the link — Import-template-dolphin{anty}.xlsx****, or click "Download template" directly in the bulk import window.
- Fill it out according to the provided example, without changing the columns — just enter the necessary data for each profile (name, cookies, proxy, user-agent, etc.)
- Insert the completed template into the file field or click "From file". It won't hurt to verify correctness using the "Check data" button.
- Edit the settings if necessary. The OS and profile type will be set the same for all profiles from the file. For the remaining parameters, the following options are available:
- Off — the parameter will be disabled for each profile
- Manual — the parameter will be the same for all profiles, as you entered
- Real — the parameter will be the same for all profiles
- Noise — the parameter will be masked for all profiles
- Random — the parameter will be different for each profile
- Altered — the parameter will be different for each profile Random parameters for each profile can be set in: proxy (from file or one for all), user-agent (random or from file), WebRTC, WebGL info, processor, memory, MAC address, device name, screen, media.
- Click "Create profile" ✅
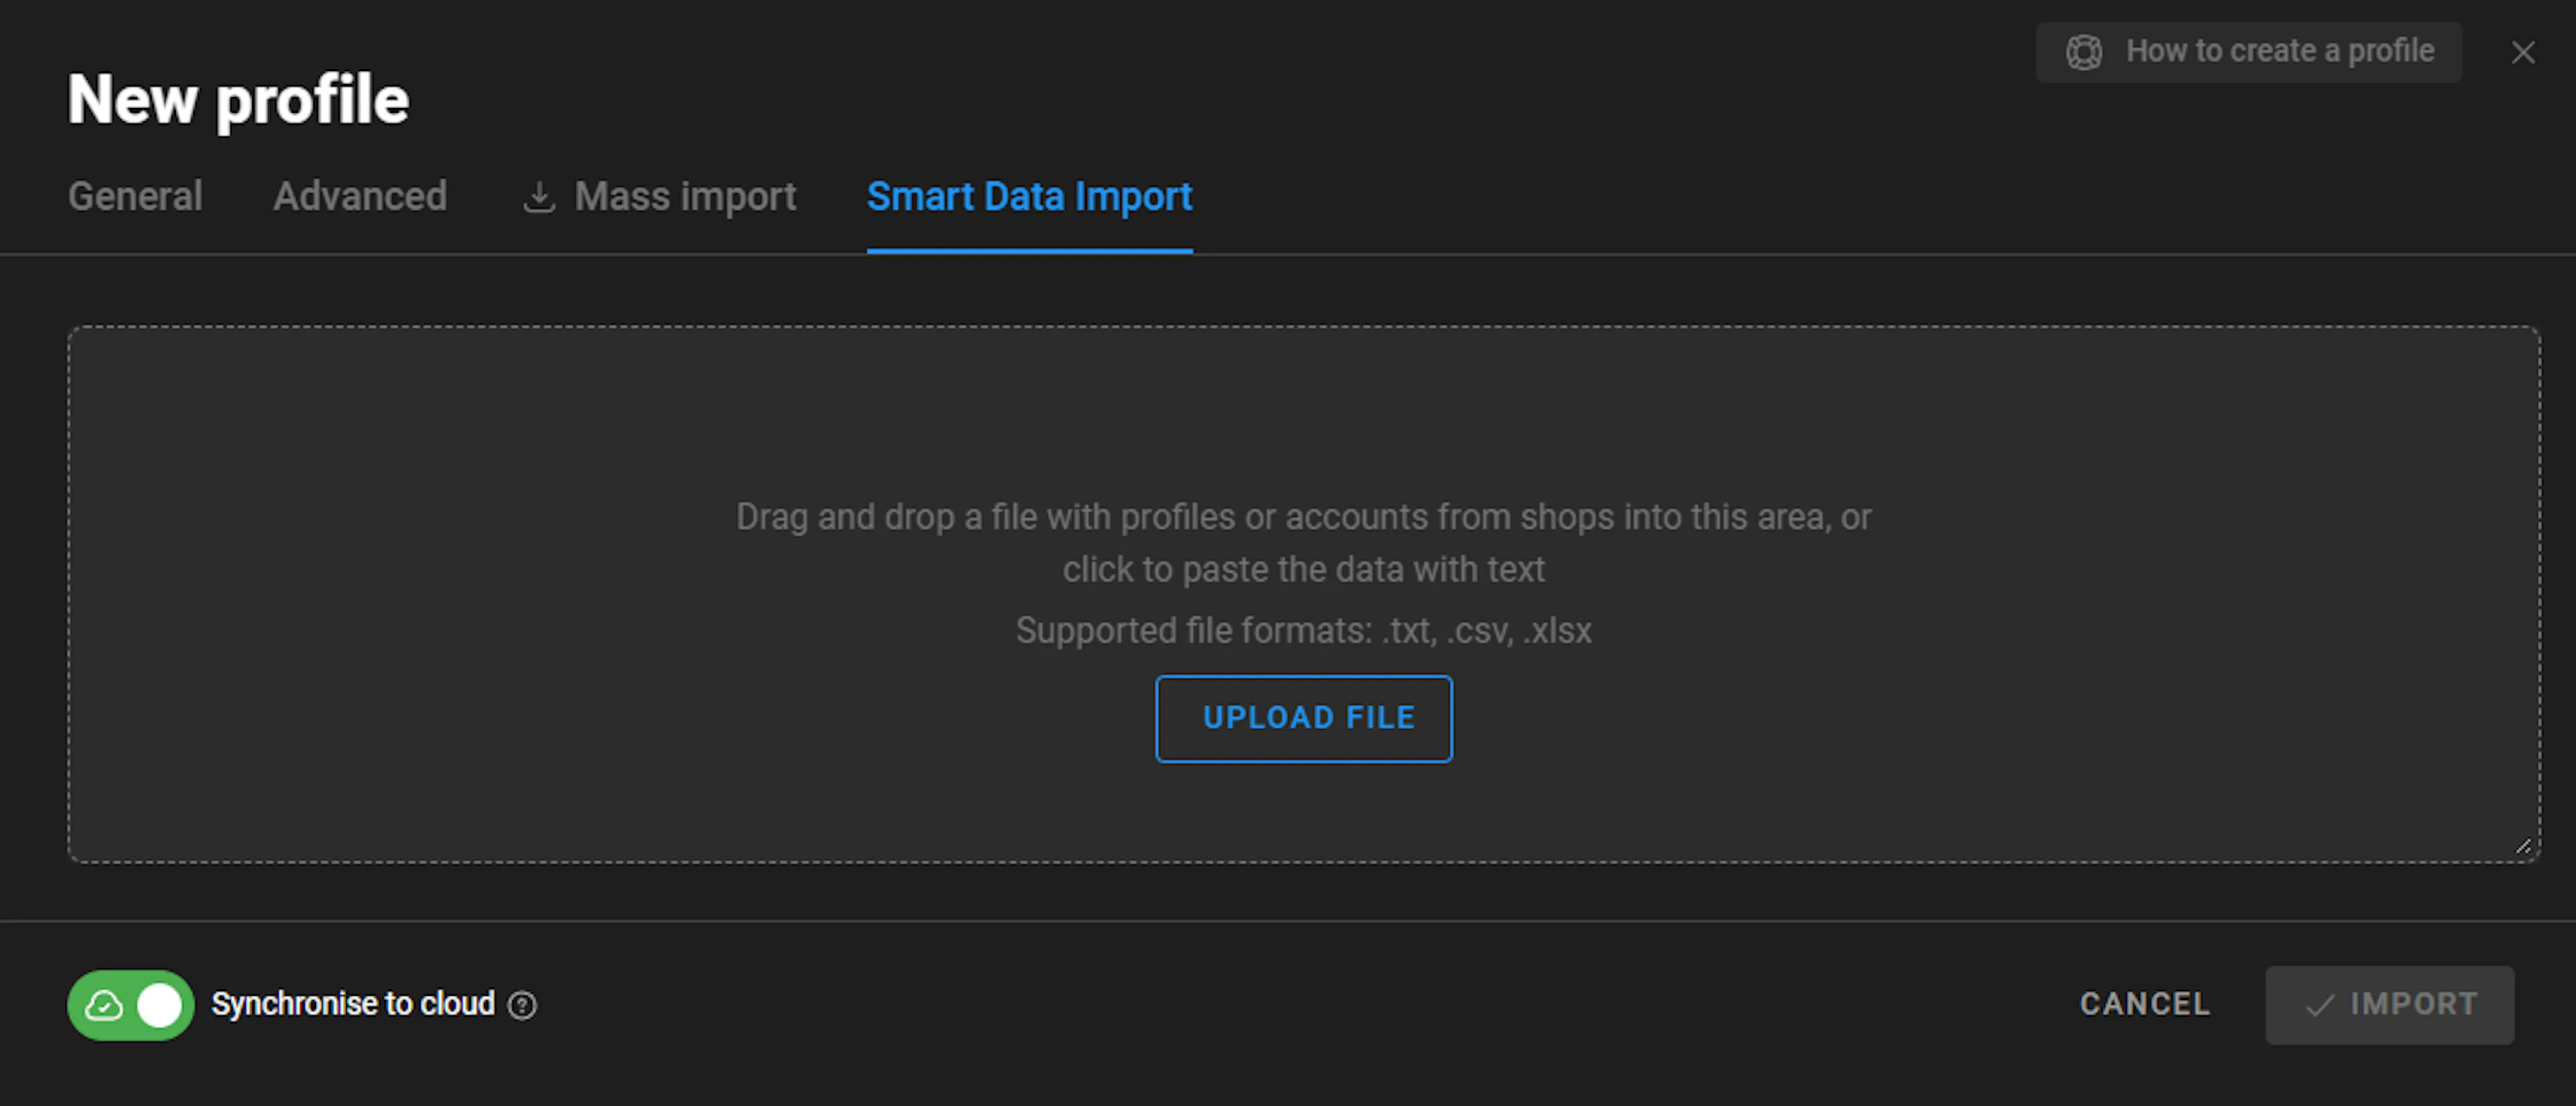
🧠 Smart Data Import
Smart Import allows you to bulk-create profiles from files containing accounts. The system automatically recognizes the data structure and maps it to the right fields — all you need to do is review and click "Import" 😉
How to start?
- Open the profile creation window and go to the "Smart Data Import" tab. You'll see a field where you can drag and drop a file or click to paste data as text. Supported formats: .txt, .csv, .xlsx.
- After uploading a file, the system will show its name and the number of profiles to be created. Click "Check Data" to see how the system parsed the file — a table will open with columns: auth login, password, email login, email password, user-agent, cookies, proxy type, proxy, auth token, etc.

- If the system detected something incorrectly, click the pencil icon next to any column name. In the window that opens, you can:
- Specify which row to start parsing from
- Choose a delimiter: ``
- Select which specific data fragment from the row to use for that column. Click "Save" when done ✅
- Below you'll find the "Import Settings" block, where you can set:
- Profile names: by default, the macro
{{EMAIL.LOGIN}}is used. Click "+ Add Macro" to choose from the available options:{{COUNT.ID}}- sequential number{{AUTH.LOGIN}}- account login{{EMAIL.LOGIN}}- email account login{{DATE}}- current date in YYYY-MM-DD format

- Tags, Status, Folder: can be assigned to all imported profiles right away
- Profile type: FB, Google, TikTok, Crypto, or none
- Start pages
- Proxy: choose "No proxy," create a new one, select from saved, or pull "From file"
- OS: Windows 11, Windows 10, macOS, Linux
- User-agent: "Set the actual," "From file," or "Manual." If the file contains an outdated user-agent, the system will automatically replace it with the actual at the moment, browser engine version.

- After this, the main hardware settings follow, as with standard profile creation. It's recommended to leave them at the default.

- When everything is ready, click "Import" 🚀
Copying profiles 📋
If you already have a created profile and have tested that it works, but you need many identical profiles (or ones with different fingerprints) at once, click the "three dots" next to the profile name, then select "Copy profile".
Next, optionally:
- To make the copies have the same fingerprint and settings, turn off the "randomize fingerprint" option
- To make the copies have different fingerprints and settings, turn on the "randomize fingerprint" option
After that, click "Copy" and watch the result 😉

💡 If the specified number of copies is greater than the number available for the current plan, the system will create the maximum possible number of copies.
Profile templates 📑
Templates let you skip configuring each profile from scratch. You save a set of parameters (profile type, OS, proxy, fingerprint, etc.) as a template — and then create a profile from it in one click via the "Quick Profile" menu. You can make different templates for different tasks and switch between them.
⚠️ The feature is available on the Base plan and higher. On the Free and Starter plans, templates are visible in the menu, but you'll only be able to create them after upgrading to a higher plan.
Template limits by plan:
- Base — up to 10 templates
- Team — up to 50 templates
- Enterprise — up to 1000 templates
You only see your own templates — other team members have their own, and you don't have access to them.
Where to find templates
Click the arrow to the right of the "Quick Profile" button at the top of the window. In the dropdown menu, the OS options for quick creation (Windows 10/11, macOS, Linux) appear at the top, and below them is the "Templates" section with all saved templates and a "+ Create new template" button.
How to create a template ✅
- In the "Quick Profile" dropdown menu, click "+ Create new template".
- A setup window will open — it mirrors the regular profile creation window. Fill in:
- Template name (required)
- Status, Tags, Folder — optional
- Profile type: FB, Google, TikTok, Crypto, OnlyFans, or "Not specified"
- Start pages
- Proxy: no proxy, new, select from existing, or NodeMaven proxy
- OS: Windows 11, Windows 10, macOS, or Linux
- Below are the hardware parameters (fingerprint, screen, media, etc.) — same as with standard profile creation. You can leave them at the default.
- Click "Create template".
💡 A single template can have only one OS and one profile type. If you need profiles for different sites or systems — make separate templates.
How to create a profile from a template
In the "Quick Profile" menu, under the "Templates" section, just click the template you need — a profile will be created with its settings. The profile limit for your plan is still respected: you won't be able to create more than allowed.
Editing Profile ✏️
To edit a profile (change the proxy, change settings, add tags, etc.) click the "three dots" to the left of the profile and select "Edit".
You'll be able to edit the "General" parameters or configure the "Advanced" parameters of the profile.

The browser profile settings include parameters such as WebRTC, Canvas, WebGL, Client Rects, Timezone, Language, Geo, GPU, Memory, Screen, Media, Ports, Do not track, and others.
All spoofing is done at the browser engine level, no JS injections ✅
⚠️ Changing these values is recommended only if you know what you're doing and why.
The default settings are sufficient for normal operation. If you still want to change something, the following parameters can be safely adjusted: timezone, language, GEO, processor, memory, screen, media.
We recommend not touching the Do not track parameter, most websites track behavior within the profile, and blocking this tracking can negatively affect performance.
More details about the meaning of all settings.
After making changes, click "Save" in the top right corner. ✅